Question 1
Refer to Exhibit.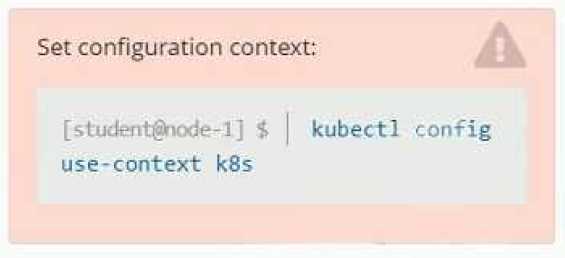
Context
As a Kubernetes application developer you will often find yourself needing to update a running
application.
Task
Please complete the following:
•
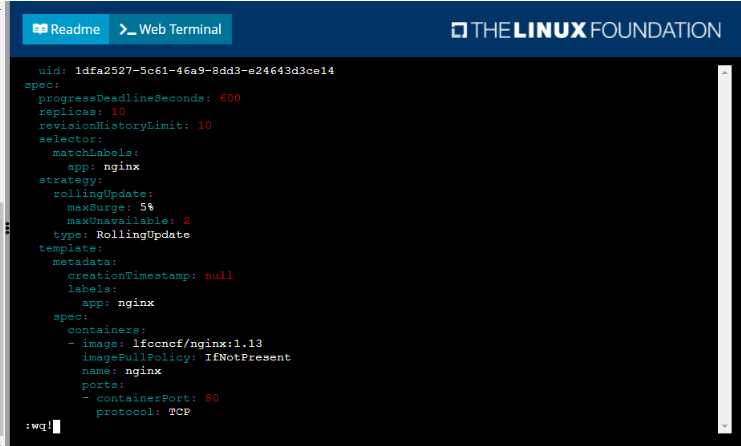
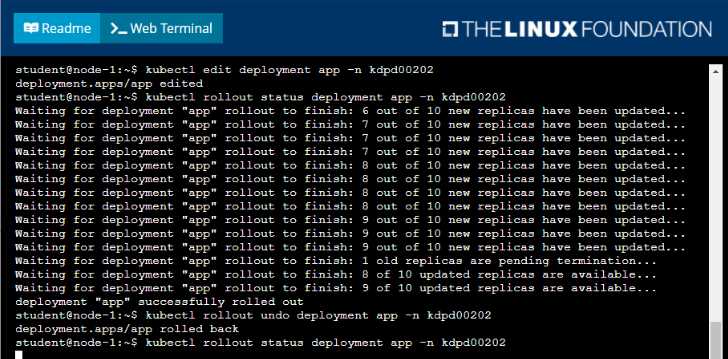
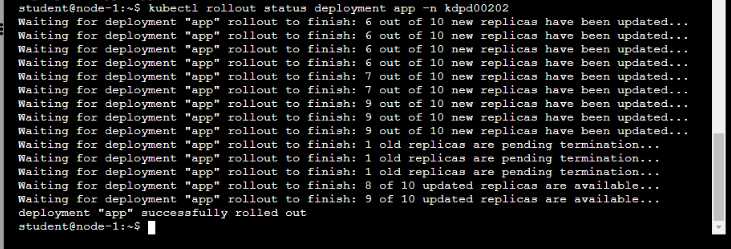
Update the app deployment in the kdpd00202 namespace with a maxSurge of 5% and a
maxUnavailable of 2%
• Perform a rolling update of the web1 deployment, changing the Ifccncf/ngmx image version to
1.13
• Roll back the app deployment to the previous version
Answer:
See the
solution below.
Explanation:
Solution:
Comments
Question 2
Refer to Exhibit.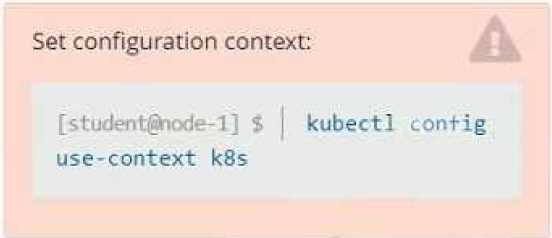
Context
You have been tasked with scaling an existing deployment for availability, and creating a service to
expose the deployment within your infrastructure.
Task
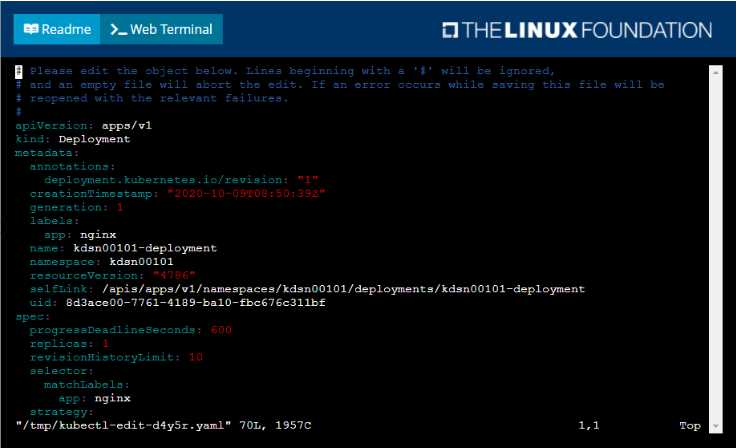
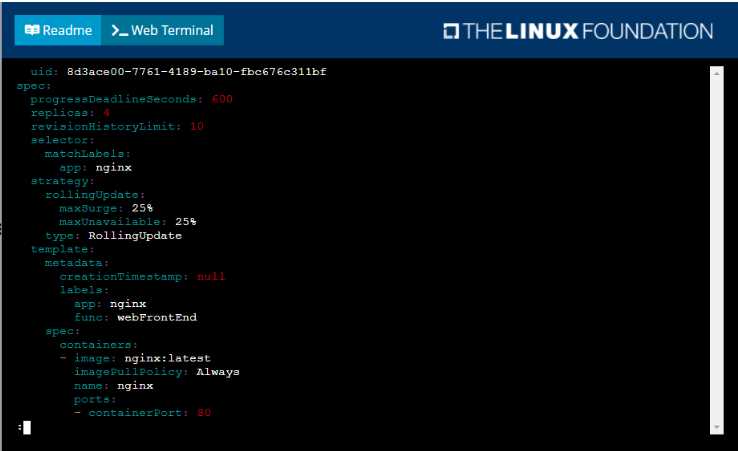
Start with the deployment named kdsn00101-deployment which has already been deployed to the
namespace kdsn00101 . Edit it to:
• Add the func=webFrontEnd key/value label to the pod template metadata to identify the pod for
the service definition
• Have 4 replicas
Next, create ana deploy in namespace kdsn00l01 a service that accomplishes the following:
• Exposes the service on TCP port 8080
• is mapped to me pods defined by the specification of kdsn00l01-deployment
• Is of type NodePort
• Has a name of cherry
Answer:
See the
solution below.
Explanation:
Solution:

Comments
Question 3
Refer to Exhibit.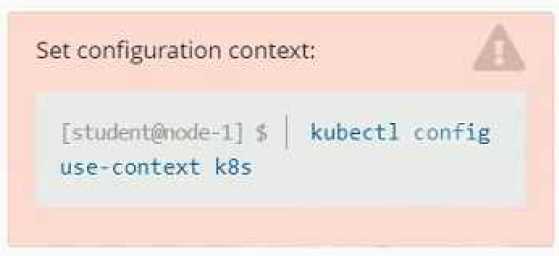
Set Configuration Context:
[student@node-1] $ | kubectl
Config use-context k8s
Context
A container within the poller pod is hard-coded to connect the nginxsvc service on port 90 . As this
port changes to 5050 an additional container needs to be added to the poller pod which adapts the
container to connect to this new port. This should be realized as an ambassador container within the
pod.
Task
• Update the nginxsvc service to serve on port 5050.
• Add an HAproxy container named haproxy bound to port 90 to the poller pod and deploy the
enhanced pod. Use the image haproxy and inject the configuration located at
/opt/KDMC00101/haproxy.cfg, with a ConfigMap named haproxy-config, mounted into the container
so that haproxy.cfg is available at /usr/local/etc/haproxy/haproxy.cfg. Ensure that you update the
args of the poller container to connect to localhost instead of nginxsvc so that the connection is
correctly proxied to the new service endpoint. You must not modify the port of the endpoint in
poller's args . The spec file used to create the initial poller pod is available in
/opt/KDMC00101/poller.yaml
Answer:
See the
solution below.
Explanation:
Solution:
To update the nginxsvc service to serve on port 5050, you will need to edit the service's definition
yaml file. You can use the kubectl edit command to edit the service in place.
kubectl edit svc nginxsvc
This will open the service definition yaml file in your default editor. Change the targetPort of the
service to 5050 and save the file.
To add an HAproxy container named haproxy bound to port 90 to the poller pod, you will need to
edit the pod's definition yaml file located at /opt/KDMC00101/poller.yaml.
You can add a new container to the pod's definition yaml file, with the following configuration:
containers:
- name: haproxy
image: haproxy
ports:
- containerPort: 90
volumeMounts:
- name: haproxy-config
mountPath: /usr/local/etc/haproxy/haproxy.cfg
subPath: haproxy.cfg
args: ["haproxy", "-f", "/usr/local/etc/haproxy/haproxy.cfg"]
This will add the HAproxy container to the pod and configure it to listen on port 90. It will also mount
the ConfigMap haproxy-config to the container, so that haproxy.cfg is available at
/usr/local/etc/haproxy/haproxy.cfg.
To inject the configuration located at /opt/KDMC00101/haproxy.cfg to the container, you will need to
create a ConfigMap using the following command:
kubectl create configmap haproxy-config --from-file=/opt/KDMC00101/haproxy.cfg
You will also need to update the args of the poller container so that it connects to localhost instead of
nginxsvc. You can do this by editing the pod's definition yaml file and changing the args field to args:
["poller","--host=localhost"].
Once you have made these changes, you can deploy the updated pod to the cluster by running the
following command:
kubectl apply -f /opt/KDMC00101/poller.yaml
This will deploy the enhanced pod with the HAproxy container to the cluster. The HAproxy container
will listen on port 90 and proxy connections to the nginxsvc service on port 5050. The poller
container will connect to localhost instead of nginxsvc, so that the connection is correctly proxied to
the new service endpoint.
Please note that, this is a basic example and you may need to tweak the haproxy.cfg file and the args
based on your use case.
Comments
Question 4
Refer to Exhibit.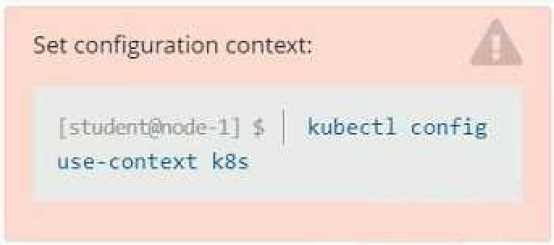
Context
Developers occasionally need to submit pods that run periodically.
Task
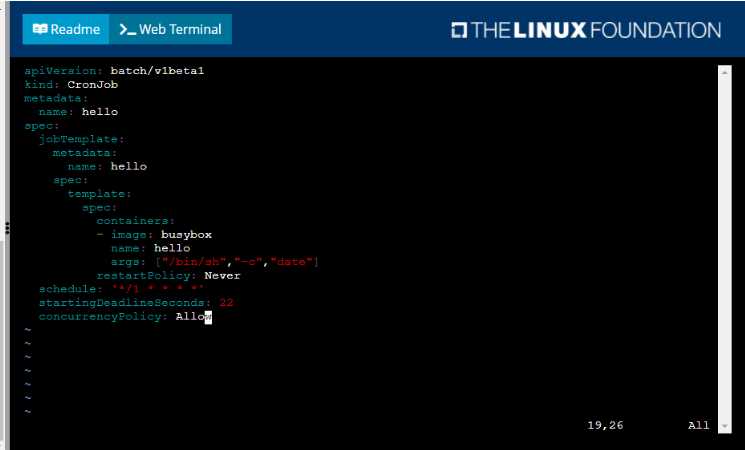
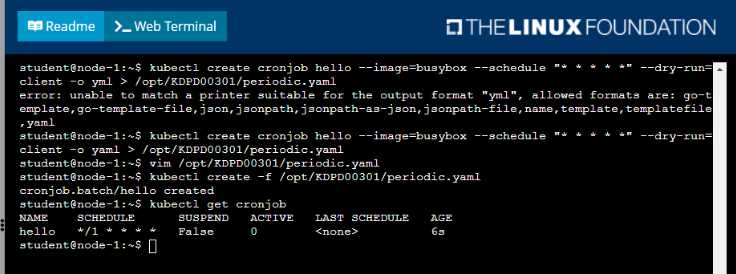
Follow the steps below to create a pod that will start at a predetermined time and]which runs to
completion only once each time it is started:
• Create a YAML formatted Kubernetes manifest /opt/KDPD00301/periodic.yaml that runs the
following shell command: date in a single busybox container. The command should run every minute
and must complete within 22 seconds or be terminated oy Kubernetes. The Cronjob namp and
container name should both be hello
• Create the resource in the above manifest and verify that the job executes successfully at least
once
Answer:
See the
solution below.
Explanation:
Solution: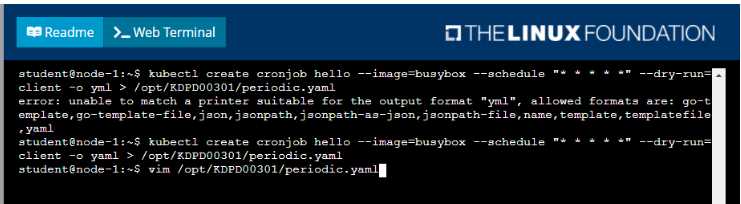
Comments
Question 5
Refer to Exhibit.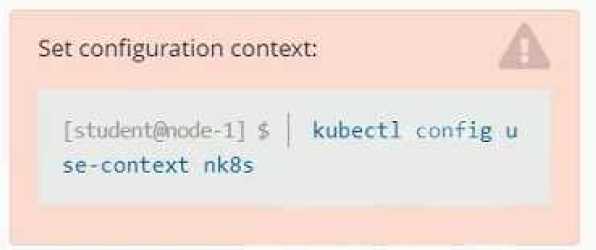
Task
A deployment is falling on the cluster due to an incorrect image being specified. Locate the
deployment, and fix the problem.
Answer:
See the
solution below
Explanation:
create deploy hello-deploy --image=nginx --dry-run=client -o yaml > hello-deploy.yaml
Update deployment image to nginx:1.17.4: kubectl set image deploy/hello-
deploy nginx=nginx:1.17.4
Comments
Question 6
Refer to Exhibit.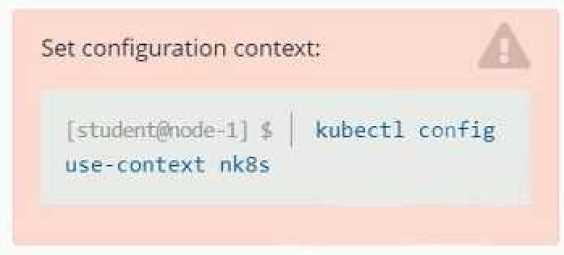
Set Configuration Context:
[student@node-1] $ | kubectl
Config use-context k8s
Task
You have rolled out a new pod to your infrastructure and now you need to allow it to communicate
with the web and storage pods but nothing else. Given the running pod kdsn00201 -newpod edit it to
use a network policy that will allow it to send and receive traffic only to and from the web and
storage pods.
Answer:
See the
solution below.
Explanation:
To allow a pod to send and receive traffic only to and from specific pods, you can use network
policies in Kubernetes.
First, you will need to create a network policy that defines the allowed traffic. You can create a
network policy yaml file with the following rules:
apiVersion: networking.k8s.io/v1
kind: NetworkPolicy
metadata:
name: newpod-network-policy
namespace: default
spec:
podSelector:
matchLabels:
app: kdsn00201-newpod
ingress:
- from:
- podSelector:
matchLabels:
app: web
- podSelector:
matchLabels:
app: storage
This policy will only allow incoming traffic to the pod with the label app=kdsn00201-newpod from
pods with the label app=web or app=storage. If you have different labels on your web and storage
pods please update the matchLabels accordingly.
Once you have created the network policy, you can apply it to the cluster by running the following
command:
kubectl apply -f <network-policy-file>.yaml
This will apply the network policy to the cluster, and the newpod will only be able to send and
receive traffic to and from the web and storage pods.
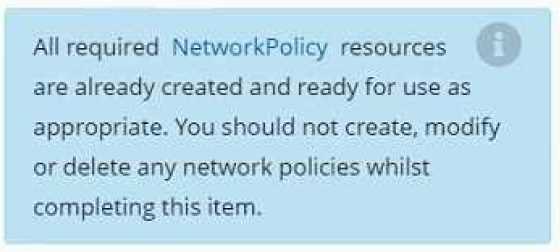
Please note that, NetworkPolicy resource is not available by default, you need to enable the
NetworkPolicy feature on your Kubernetes cluster. This feature is enabled by default on some
clusters and must be explicitly enabled on others. You can check if NetworkPolicy is available by
running the command kubectl api-versions | grep networking
Also, you need to ensure that the pods that you want to allow traffic to and from are running on the
same namespace.
Comments
Question 7
Refer to Exhibit.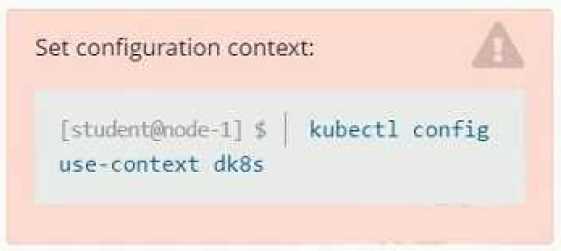
Set Configuration Context:
[student@node-1] $ | kubectl
Config use-context k8s
Context
A user has reported an aopticauon is unteachable due to a failing livenessProbe .
Task
Perform the following tasks:
• Find the broken pod and store its name and namespace to /opt/KDOB00401/broken.txt in the
format:
<namespace>/<pod>
The output file has already been created
• Store the associated error events to a file /opt/KDOB00401/error.txt, The output file has already
been created. You will need to use the -o wide output specifier with your command
• Fix the issue.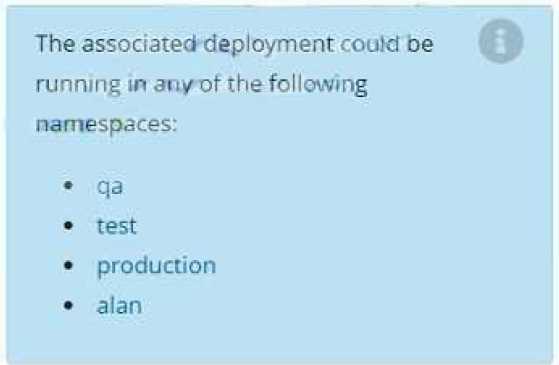
Answer:
See the
solution below.
Explanation:
To find the broken pod and store its name and namespace to /opt/KDOB00401/broken.txt, you can
use the kubectl get pods command and filter the output by the status of the pod.
kubectl
get
pods
--field-selector=status.phase=Failed
-o
jsonpath='{.items[*].metadata.namespace}/{.items[*].metadata.name}'
>
/opt/KDOB00401/broken.txt
This command will list all pods with a status of Failed and output their names and namespaces in the
format <namespace>/<pod>. The output is then written to the /opt/KDOB00401/broken.txt file.
To store the associated error events to a file /opt/KDOB00401/error.txt, you can use the kubectl
describe command to retrieve detailed information about the pod, and the grep command to filter
the output for error events.
kubectl describe pods <pod-name> --namespace <pod-namespace> | grep -i error -B5 -A5 >
/opt/KDOB00401/error.txt
Replace <pod-name> and <pod-namespace> with the name and namespace of the broken pod you
found in the previous step.
This command will output detailed information about the pod, including error events. The grep
command filters the output for lines containing "error" and also prints 5 lines before and after the
match.
To fix the issue, you need to analyze the error events and find the root cause of the issue.
It could be that the application inside the pod is not running, the container image is not available,
the pod has not enough resources, or the liveness probe configuration is incorrect.
Once you have identified the cause, you can take appropriate action, such as restarting the
application, updating the container image, increasing the resources, or modifying the liveness probe
configuration.
After fixing the issue, you can use the kubectl get pods command to check the status of the pod and
ensure
Comments
Question 8
Refer to Exhibit.
Context
A project that you are working on has a requirement for persistent data to be available.
Task
To facilitate this, perform the following tasks:
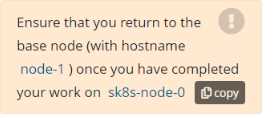
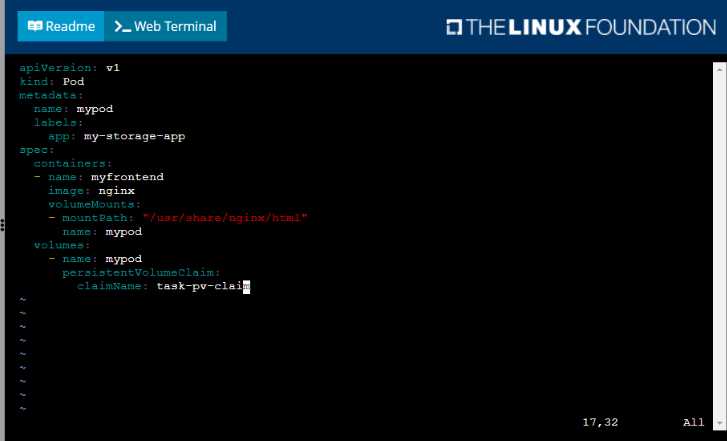
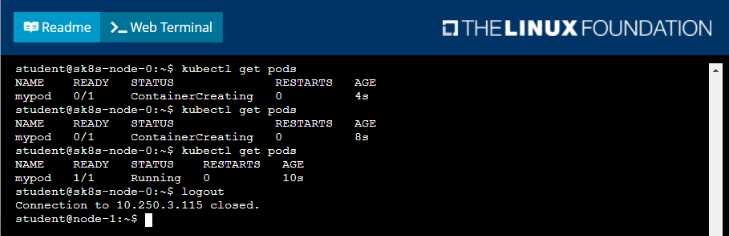
•
Create a file on node sk8s-node-0 at /opt/KDSP00101/data/index.html with the content
Acct=Finance
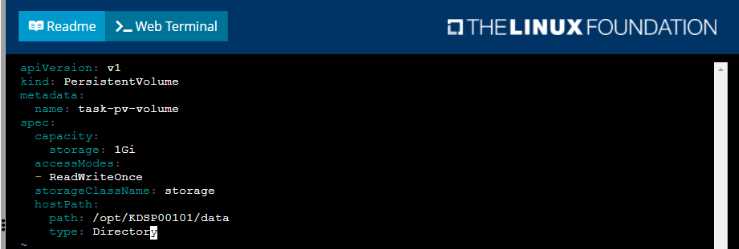
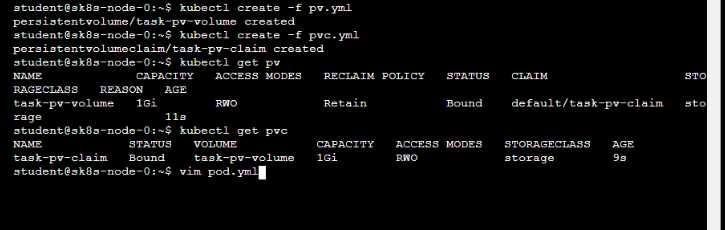
• Create a PersistentVolume named task-pv-volume using hostPath and allocate 1Gi to it, specifying
that the volume is at /opt/KDSP00101/data on the cluster's node. The configuration should specify
the access mode of ReadWriteOnce . It should define the StorageClass name exam for the
PersistentVolume , which will be used to bind PersistentVolumeClaim requests to this
PersistenetVolume.
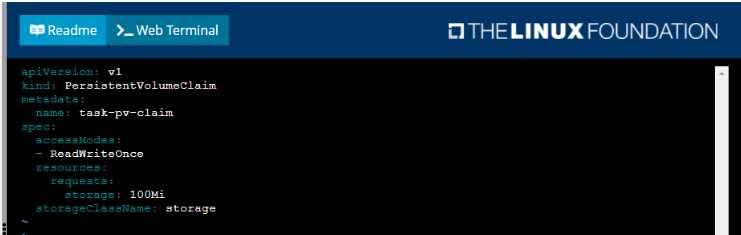
• Create a PefsissentVolumeClaim named task-pv-claim that requests a volume of at least 100Mi
and specifies an access mode of ReadWriteOnce
• Create a pod that uses the PersistentVolmeClaim as a volume with a label app: my-storage-app
mounting the resulting volume to a mountPath /usr/share/nginx/html inside the pod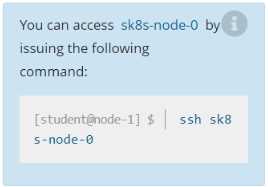
Answer:
See the
solution below.
Explanation:
Solution:


Comments
Question 9
Refer to Exhibit.
Given a container that writes a log file in format A and a container that converts log files from format
A to format B, create a deployment that runs both containers such that the log files from the first
container are converted by the second container, emitting logs in format B.
Task:
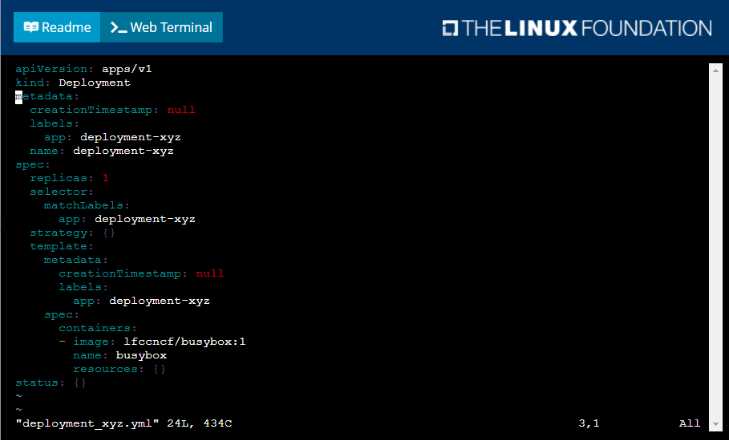
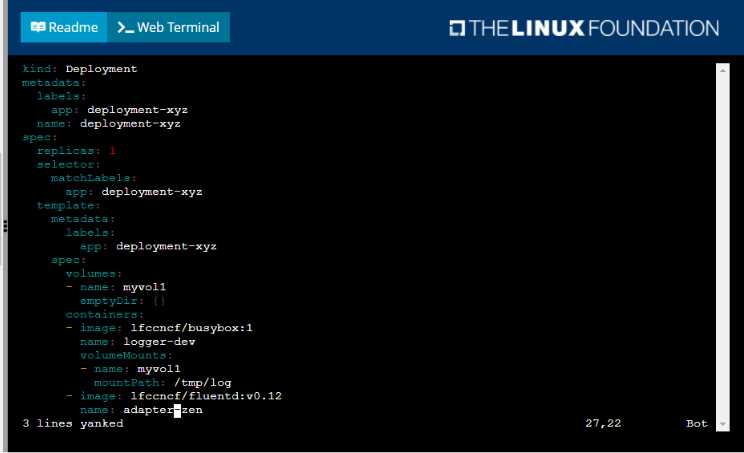
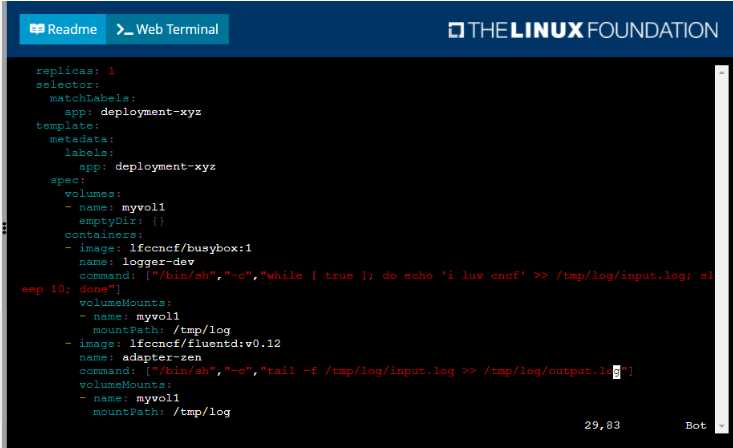
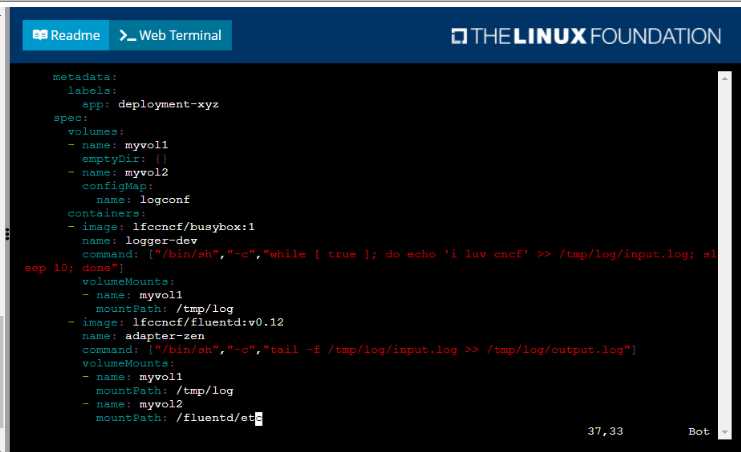
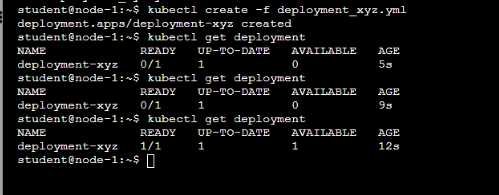
• Create a deployment named deployment-xyz in the default namespace, that:
•
Includes a primary
lfccncf/busybox:1 container, named logger-dev
•
includes a sidecar Ifccncf/fluentd:v0.12 container, named adapter-zen
•
Mounts a shared volume /tmp/log on both containers, which does not persist when the pod
is deleted
•
Instructs the logger-dev
container to run the command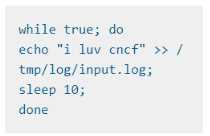
which should output logs to /tmp/log/input.log in plain text format, with example values:
• The adapter-zen sidecar container should read /tmp/log/input.log and output the data to
/tmp/log/output.* in Fluentd JSON format. Note that no knowledge of Fluentd is required to
complete this task: all you will need to achieve this is to create the ConfigMap from the spec file
provided at /opt/KDMC00102/fluentd-configma p.yaml , and mount that ConfigMap to /fluentd/etc
in the adapter-zen sidecar container
Answer:
See the
solution below.
Explanation:
Solution:
Comments
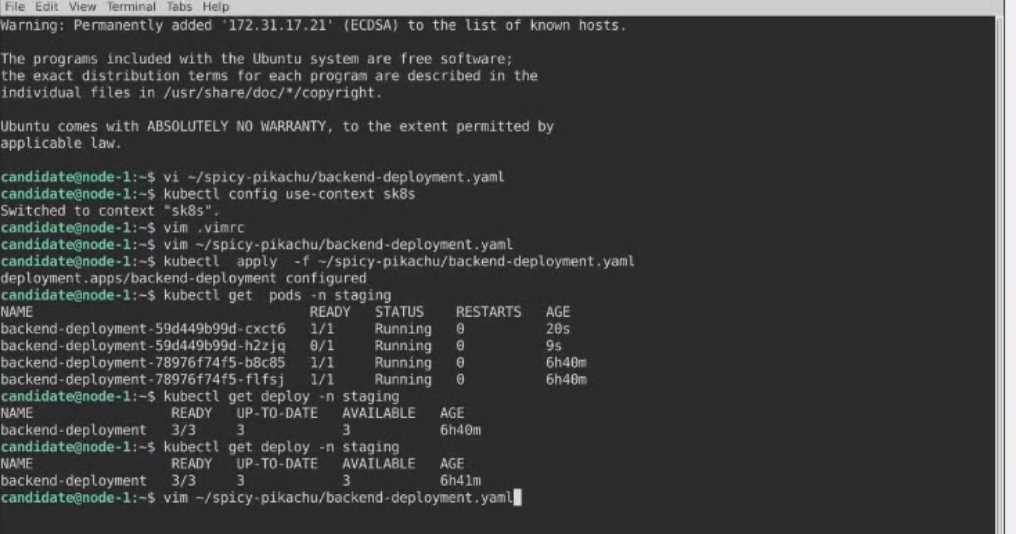
Question 10
Refer to Exhibit.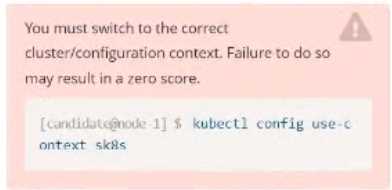
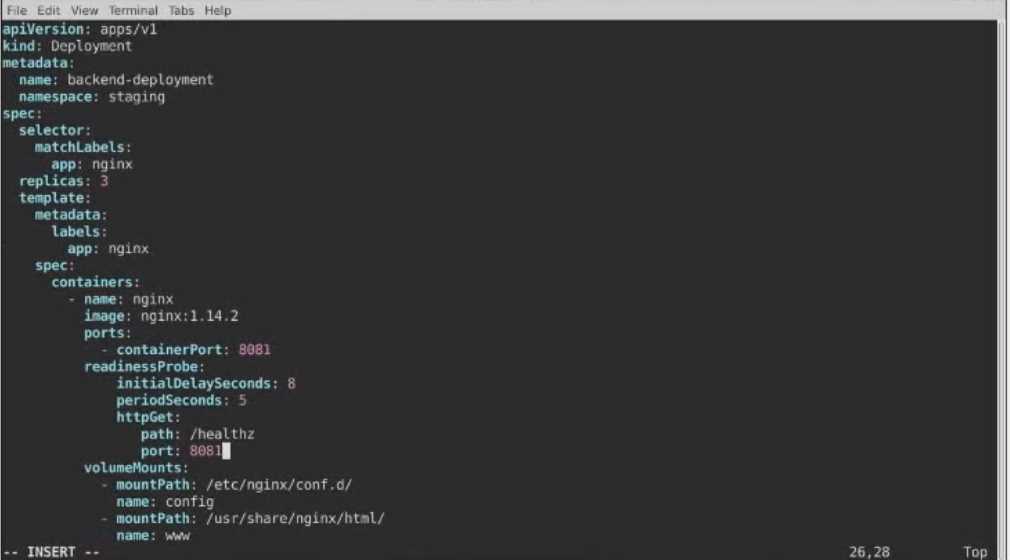
Task
A Deployment named backend-deployment in namespace staging runs a web application on port
8081.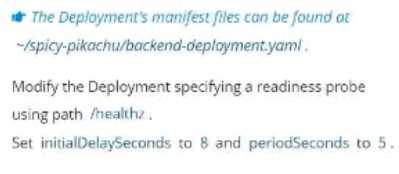
Answer:
See the
solution below.
Explanation:
Solution: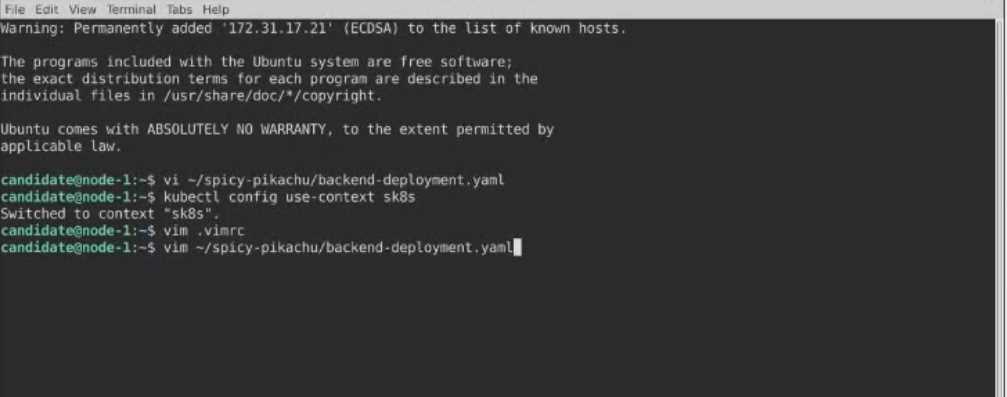
Comments
Page 1 out of 3
Viewing questions 1-10 out of 33
page 2